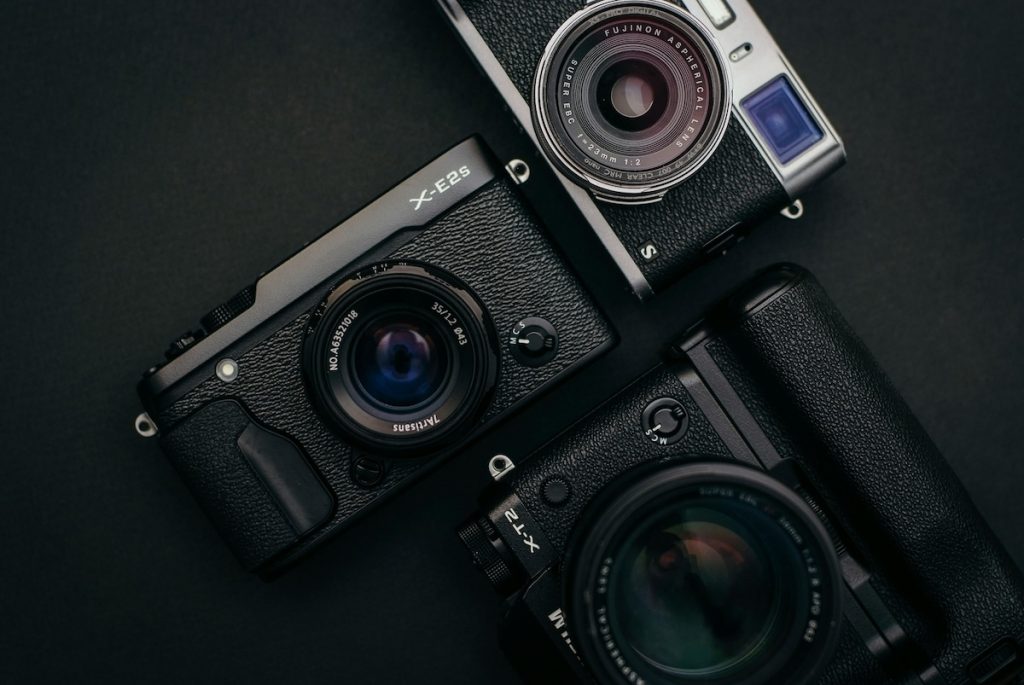
Buying a used mirrorless camera can be a great way to expand your photography kit on a budget. However, when purchasing a camera from a camera shop or an individual seller, you lose the peace of mind offered by store refunds and manufacturer warranties.
Thoroughly inspecting a used mirrorless camera before making the purchase is crucial to ensure it functions properly. You’ll want to check for any physical damage, test all features and settings, and confirm the camera’s firmware is up-to-date.
Gather Your Equipment and Prepare the Camera
Necessary items
Before inspecting a used mirrorless camera, gather the following essential items:
- Your smartphone: The LED flash on your phone can help illuminate the camera’s interior for a thorough inspection.
- A compatible lens: Bring a lens that is compatible with the camera you’re inspecting to test the lens mount and autofocus functionality.
- A memory card: You’ll need a memory card to take test shots and check the camera’s image quality.
- A tripod mounting plate or a 1/4-inch 20 screw: This will allow you to check the integrity of the camera’s tripod mount.
- A hot shoe-mounted flash (optional): If available, bring a compatible external flash to test the camera’s hot shoe mount.
Initial setup of the camera
- Remove the battery: Open the battery compartment and carefully remove the battery. Inspect the battery compartment and battery contacts for signs of corrosion or damage, which could be a deal-breaker.
- Check the hot shoe mount: Examine the camera’s hot shoe mount for corrosion. If you brought an external flash, mount it and test its functionality by taking a few test shots.
- Mount a compatible lens: Attach a compatible lens to the camera body, ensuring it secures in place with an audible click. Test the autofocus and aperture adjustments by taking several photos while changing the focus point and aperture settings.
- Inspect the tripod mount: Visually inspect the tripod mount for any cross-threading or damage. For a more thorough check, attach a tripod mounting plate or a 1/4-inch 20 screw to confirm its integrity.
- Check the strap connectors: Examine the metal strap connectors on the sides of the camera body, ensuring they are not bent, cracked, or detaching.
- Power on the camera: With the battery inserted and compartment closed, turn on the camera’s power to proceed with further testing.
By gathering the necessary items and performing these initial setup steps, you’ll be prepared to conduct a comprehensive inspection of the used mirrorless camera.
Physical Inspection
Examine the camera body for any signs of damage, such as missing paint, stripped screws, or damage to the viewfinder. Inspect for spots or dust on the sensor, typically visible in test shots reviewed on a computer. Verify the camera’s overall functionality, ensuring that buttons, dials, and touchscreen are responsive.
Check the camera body
Open the battery compartment and remove the battery. On most modern cameras, the battery is spring-ejected upon release. A damaged or defective lithium battery can sometimes swell to a point where the spring cannot push it far enough to pull out. This is a sign the battery will need replacing. Once the battery is removed, use your phone’s LED to inspect the electronic contacts inside the battery compartment for signs of corrosion or oxidation. Consider any damage a deal breaker because it can cause shorts, power loss, and so forth.
Inspect the electronic terminals
Modern cameras have a variety of electronic terminals such as HDMI, USB, and audio ports. Because there are so many, it’s not always practical to check every port without the appropriate cables and connecting device on hand. Instead, perform a visual inspection of each terminal for dust, debris, and bent or broken pins. When buying a camera for a purpose that involves a specific terminal, definitely bring something to ensure it’s in working order.
Also, make sure to check the camera’s external flash hot shoe mount for corrosion. Some mounts may be covered by plastic tabs, so feel free to remove them. Better yet, bring any hot shoe-mounted flash and test it with the camera. While most flash units are designed to work with a specific camera system, virtually every contemporary camera can fire a hot shoe flash when taking a photo. Pay attention to the condition of the plastic doors and rubber flaps that protect the terminals. Do they close flush with the camera body? Are the anchors attaching the rubber flaps in good shape? For cameras with weather resistance, check the condition of the rubber or foam seals on all the doors and flaps.
Check the battery and memory card slots
With the aid of your phone’s LED, check the slots for dust and damage. This is a critical check on cameras that use Compact Flash (CF) cards since they don’t physically prevent accidental sideways insertion, which could lead to bent pins. Always bring your own memory cards to check for compatibility. Make sure they lock into place, and the camera can read and write to them—you can snap a few photos to confirm.
Evaluate the condition and performance of the battery and memory card slots – vital components that affect usability on the field.
Functional Testing
Power on and basic functionality test
Turn on the camera and ensure it powers up correctly. Check that the memory card slot(s) function properly by inserting a compatible memory card and confirming that the camera can read and write to it. Take a few test shots to verify that the images are being saved correctly.
Inspect the electronic terminals, such as HDMI, USB, and audio ports, for any signs of damage, dust, or bent pins. If the camera has a hot shoe mount for an external flash, check it for corrosion and test its functionality by mounting a compatible flash unit and taking some test shots.
Check the autofocus and shooting modes
Evaluate the autofocus system’s performance by composing a shot with a well-defined subject against a contrasting background. Use a single focus point and take two photos, one focusing on the left edge of the subject and another on the right edge. Repeat this process for the top and bottom edges if desired. Review the images to confirm that the camera focused accurately on the intended areas.
Verify that the shooting mode dial is working correctly by rotating it through the various modes (Manual, Aperture Priority, Shutter Priority, etc.). Ensure that the camera responds appropriately to the selected mode and that the detents are firm and precise.
Test the image sensor and LCD/EVF
Perform a visual inspection of the image sensor by removing the lens or body cap and examining the sensor with the aid of your phone’s LED light. Look for any scratches, dust, or damage on the smooth, iridescent surface of the sensor.
To further inspect the sensor, take a test shot at a high aperture (f/16 or higher) pointed at a bright, featureless subject like the sky or a white wall. Review the image for any blurry dots, specks, squiggles, or lines, which may indicate dust, debris, or scratches on the sensor.
Check the rear LCD screen by taking an overexposed (white) and underexposed (black) test shot to identify any dead or hot pixels. If the camera has an electronic viewfinder (EVF), review the test shots through the EVF as well, and check for any defective pixels or issues with the diopter control.
If the camera features a multi-directional or articulating screen, test the condition of its joints by moving it around and ensuring it stays in place securely.
Conclusion
Thoroughly inspecting a used mirrorless camera before making a purchase is crucial to ensure you’re getting a well-functioning device. By following the steps outlined in this article, you can thoroughly evaluate the physical condition, test various features and settings, and confirm the overall functionality of the camera from a reputable camera shop uk or individual seller.
Ultimately, a comprehensive inspection process will help you make an informed decision and avoid potential issues that could arise from purchasing a defective or damaged used mirrorless camera. With patience and due diligence, you can find a reliable pre-owned camera that meets your photography needs without breaking the bank.